|
Advanced Features in DocuClock
DocuClock can be configured to print time stamps, messages, static messages
(labels), as well as text that is saved only to a log file. All the fields can be
configured independently and all are fields are optional.
Page Setup Options for Printing
Types of fields that DocuClock supports:
Message Fields
Message
fields contain text that will be printed on the slip. The message field can be
also be changed at any time from the field in the middle of the main screen.
For instance, 200 Shares of CSCO.
Label Fields
Label
fields print a static message on each slip. Examples of label fields include
personal or company name.
Image Fields
Image fields can print image files like logos or
graphics. The field accepts the filename of the bitmap image to print.
More...
Blank Fields
Blank
fields remain blank when printed – effectively skipping a line on the slip.
"No Print" Fields
No print
fields are skipped over during the printing of the slip. Unlike the blank fields
they do not produce an empty line.
Log Fields
Log fields
are used to save a special text message to the log file. The log fields are not
printed on the slip but are written to the log file. See the
logging option section below.
Serial Number Fields
Serial number fields will print a unique sequential serial number
on each document. You can specify the starting number and select a variety of
formatting options for the printed output.
Serial Numbering Format
Options:
| (0) |
Digit placeholder.
Display a digit or a zero. If the expression has a digit
in the position where the 0 appears in the format string, display it;
otherwise, display a zero in that position.
If the number has fewer digits than there are zeros
(on either side of the decimal) in the format expression, it displays
leading or trailing zeros. |
| (#) |
Digit placeholder. Display
a digit or nothing. If the expression has a digit in the position where
the # appears in the format string, display it; otherwise, display
nothing in that position.
This symbol works like the 0 digit placeholder,
except that leading and trailing zeros aren't displayed if the number
has the same or fewer digits than there are # characters. |
| (,) |
Thousand separator. The thousand
separator separates thousands from hundreds within a number that has
four or more places to the left of the decimal separator. Standard use
of the thousand separator is specified if the format contains a thousand
separator surrounded by digit placeholders (0 or #).
|
| ("ABC") |
Literals. Display the string
inside the double quotation marks (" ").
For example:
"Serial Number:"
outputs
Serial Number: |
Date/Time Fields
Time
fields allow the printing of a time stamp in a user-defined format. By modifying
the format you can easily customize the time string that is both printed on the
slip and shown in the time window. Using the time format options you can
pinpoint when a event occurred with
millisecond
resolution.
The default format is
mm/dd/yy hh:nn:ss
The "mm" is a placeholder for
number of the month, "dd" for numeric day of month, "yy" for 2 digit year, "hh"
for hour (24 hour format), "nn" minute of hour and "ss" seconds of minute. This
yields a sample time string of
11/22/00 17:03:16
Time/Date Format
Options
DAY, DOW and DATE (d)
d Displays the day as a number without a leading zero (1 - 31).
dd Displays the day as a number with a leading zero (01 - 31).
ddd Displays the day as an abbreviation (Sun - Sat).
dddd Displays the day as a full name (Sunday - Saturday). |
HOUR (h,H)
h Displays the hour as a number without leading zeros (0 - 23).
hh Displays the hour as a number with leading zeros (00 - 23).
|
MONTH (m)
m Displays the month as a number without a leading zero (1 - 12).
If m immediately follows h or hh, the minute rather than the month is
displayed.
mm Displays the month as a number with a leading zero (01 - 12). If m
immediately follows h or hh, the minute rather than the month is displayed.
mmm Displays the month as an abbreviation (Jan - Dec).
mmmm Displays the month as a full month name (January - December).
|
MINUTE (N)
N Displays the minute as a number without leading zeros (0 - 59).
nn Displays the minute as a number with leading zeros (00 - 59). |
YEAR (y)
y Displays the day of the year as a number (1 - 366).
yy Displays the year as a 2-digit number (00 - 99).
yyyy Displays the year as a 4-digit number (100 - 9999).
|
SECOND (S)
S Displays the second as a number without leading zeros (0 - 59).
ss Displays the second as a number with leading zeros (00 - 59).
ss.s Displays the second as a decimal number with leading zeros
(00.0).
ss.ss Displays the second as a decimal number with leading zeros
(00.00).
ss.sss Displays the second and
milliseconds as a decimal number with leading zeros (00.000). For example
17:00:59.999 |
MISC (\)
\ Is an 'escape' character used to indicate the next character should
be treated as a literal. It is used to embed literal strings using reserved
characters within time strings.
|
AM-PM (A,a)
AM/PM Uses the 12-hour clock and display an uppercase AM with any
hour before noon; display an uppercase PM with any hour between noon and
11:59 P.M.
am/pm Uses the 12-hour clock and display a lowercase AM with any hour
before noon; display a lowercase PM with any hour between noon and 11:59
P.M.
A/P Uses the 12-hour clock and display an uppercase A with any hour
before noon; display an uppercase P with any hour between noon and 11:59
P.M.
a/p Uses the 12-hour clock and display a lowercase A with any hour
before noon; display a lowercase P with any hour between noon and 11:59 P.M.
AMPM Uses the 12-hour clock and display the AM string literal as
defined by your system with any hour before noon; display the PM string
literal as defined by your system with any hour between noon and 11:59 P.M.
AMPM can be either uppercase or lowercase, but the case of the string
displayed matches the string as defined by your system settings.
The default format is AM/PM. |
| |
|
Printing a Time or Date in the Future
DocuClock also has the ability to print a date or time different from the
current time. You enable this by setting the time difference from current time
(set the Time Offset option in Options->Display).
You can then print the time or date a day, week, month or year in the future.
The printer options in DocuClock allow you to change the appearance of the
printed output. DocuClock offers settings for the font size, font
type, format and printing options.
Font Format
Choose from 2 different sized fonts and 4
different font spacings to size your output.
Printer Setup
Top Margin
Sets an approximate top margin
(in inches) from where printing starts.
Left Margin
(Windows Print
version)
Sets an approximate left margin in
inches measured from the left edge of the paper.
Paper Handling
Eject paper after printing
(Direct Print
version)
When used, automatically feeds slip
out of printer after printing.
Indicator Options
DocuClock features several
useful indicators on both the DocuClock printer and on the computer screen that
let you know when DocuClock is ready to print.
On the DocuClock Screen...
Printer Status
(Direct
Print version)
Connect – shows if that the connection to the printer is
established ant that the printer is healthy.
Off-line
– shows that the printer is off or has a problem.
Time Display
The time display field shows the current time. The format of
the time string is the same as the time field selected in the page setup menu.
Custom time formatting options...
Message Field
Contains an optional message to be printed on the slip.
Upon exiting the last message will be saved.
More...
Time Stamp Button
When in the manual auto sense mode, commands the printer to
print a time stamp.
Printing Sensor Options
DocuClock features dual optical sensors that wait till the
slip is fully inserted. DocuClock can be operated using the sensors (Automatic)
or without (Manual)
Automatic – Print the
time stamp whenever a slip is introduced to the printer. No keys need be
pressed on the computer’s keyboard.
Manual – print on slip
after pressing the button on the screen when there is a slip in the printer.
Show seconds in taskbar
DocuClock can show the real time in
taskbar when the DocuClock application is minimized. DocuClock continues to
update the time every second.
On the Printer...
Indicator
Lights
POWER
This light is on
whenever power is supplied to the printer.
RELEASE
This light is on when the
printer is in the paper release mode and it is off when the printer is in the
clamp mode printing the slip.
The RELEASE light will also
blink to indicate an error condition there is a:
-
Paper jam
-
Home position error
-
Power supply problem
PAPER OUT
This red light is on when paper
is not inserted or is not inserted correctly. The paper is considered inserted
when in view of the optical sensors located in the print head.
Otherwise the printer releases the slip after printing.
The log file shows information about time stamps printed. Logging is useful for
keeping a computer record of when a slip was printed or when an event occurred.
The user can turn logging on or off and select which log file to write to.
Once a log file is specified DocuClock will add data to the log file each time a
time stamp is made. The log file will record the time the stamp was made, and
include any message and log fields selected. The log fields are only printed in
the log file. Timestamps can be printed in the file giving a precise record on
when the time stamp was made. This can be done with millisecond precision using
the msec time format options.
Log File Location
DocuClock has the option to write to a log file every time a time stamp
is made. The log file is a text file that can be located locally on the computer
or on another computer on the network.
Sample log file output:
Time
Stamp Log 11/13/01 4:11:08 PM
Date Time String
----- ---- ----------
01-11-13 16:11:08 This is a message inserted only into file
01-11-15 12:47:17 This is a message
01-12-04 23:05:31
01-12-04 23:06:25 log entry
The Action Log is a summary view of all current time stamping activity. Data are
displayed in a list on the main screen and are added as they occur. Entries
include the origination of the action and the result. Upon starting, the list
shows the five most recent events (if available). After the program closes, the
action detail can be found in the individual time stamp logs.
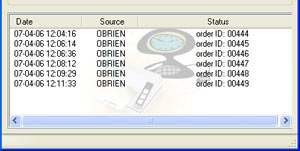
Action Log is Visible on Main Screen
Columns:
-
Date: Identifying source
icon and date and time in yy-mm-dd hh:nn:ss format.
-
Source: the printer
making the stamp.
-
Status: time stamp
message.
DocuClock
allows you to record precisely when an event occurs. Users have the
ability to print an event time and/or write the event record to a file. When
running on a computer that has its time standardized with ClockWatch software,
DocuClock can provide either a hard copy or a computer record of when an event
occurred with
millisecond precision.
To time the event the user simply presses the "Time
Stamp"
button on the computer screen or enters a paper slip in the printer to mark the
time. The log file will record the time the event occurred, and
include desired annotations. The timestamp can be made with millisecond
precision
using the msec time format options in
DocuClock.
Paper and file timestamps create a permanent record on when the event occurred.
Sample event file output:
Time
Stamp Log 11/15/01
2:11:00 PM
Date Time String
----- ---- ----------
01-11-15 14:11:08.034 Task 1 started...
01-11-15 14:11:09.631 Task 1 complete
01-11-15 14:11:12.584 Task 2 started...
01-11-15 14:11:24.139 Task 2 complete
01-11-15 14:11:25.230 Task 3 started...
...
Also available is a separate
Trigger Module that can use an external electrical
signal to log an event.
Running
DocuClock as a Service
A Service is a Windows-specific system function that runs in a special area under Windows
NT, 2000, XP or 2003. DocuClock contains a special module, which can be installed as a Service under
these versions of Windows. This allows DocuClock to run in the special service area of the
Windows operating system. Whenever Windows is running, the service is
active and DocuClock is available.
More on automating
data acquisition with DocuClock
Back to top of
page
Software
Development Kit
The DocuClock software
development kit allows you develop a custom application and integrate DocuClock
functionality with ease. A simple high level application programming interface
allows access to the most common DocuClock functions such as stamping, changing
messages, checking status, etc. The API communicates with the DocuClock service
through the Windows Service Control Manager.
The software development kit
includes a working sample application and documentation.
Available Functions
Heartbeat
– tells whether DocuClock service is running.
Status
– reports on DocuClock printer status, On-line, Off-line.
Printer Health
Check – runs a simple printer health check.
Stamp
– prints slip using the current settings.
Options Changed
– indicates that the DocuClock settings have been changed and that the service
should reset the new settings.
Reset
– reset the printer.
Message -
dynamically change the message that is printed out on each page.
Note: In
practice, you can change all types of DocuClock output lines
programmatically. In addition to the message type, these types include
logged messages, images, time format, and labels. The type of line (Message,
Time, Image, etc) is normally set by the DocuClock application interface
(Options->Page Setup). Be advised that the format for these lines is
implicitly set for each type and no format checking is done by the function
or the service. For more information, consult the DocuClock User’s Guide.
Deploying a Custom Application
The DocuClock software must first be installed
on the target machine. No additional software is required to run the API. Verify
that the DocuClock application works before testing the custom application. Use
the DocuClock application interface for initial configuration and setup of the
DocuClock printer and printed output. The DocuClock service should be set to run
automatically from the Service Manager. This ensures that the DocuClock service
is started at boot time. The DocuClock application does not need to be running
to use the SDK.
Form more information, contact
Beagle Software.
Back to top of
page
DocuClock
Product Index
DocuClock
Main Page
|